Creating Channels
SynQ UP features a multitude of channel types to help community owners and community members alike, here’s a break down of who can do what, and how to do it for creating channels:
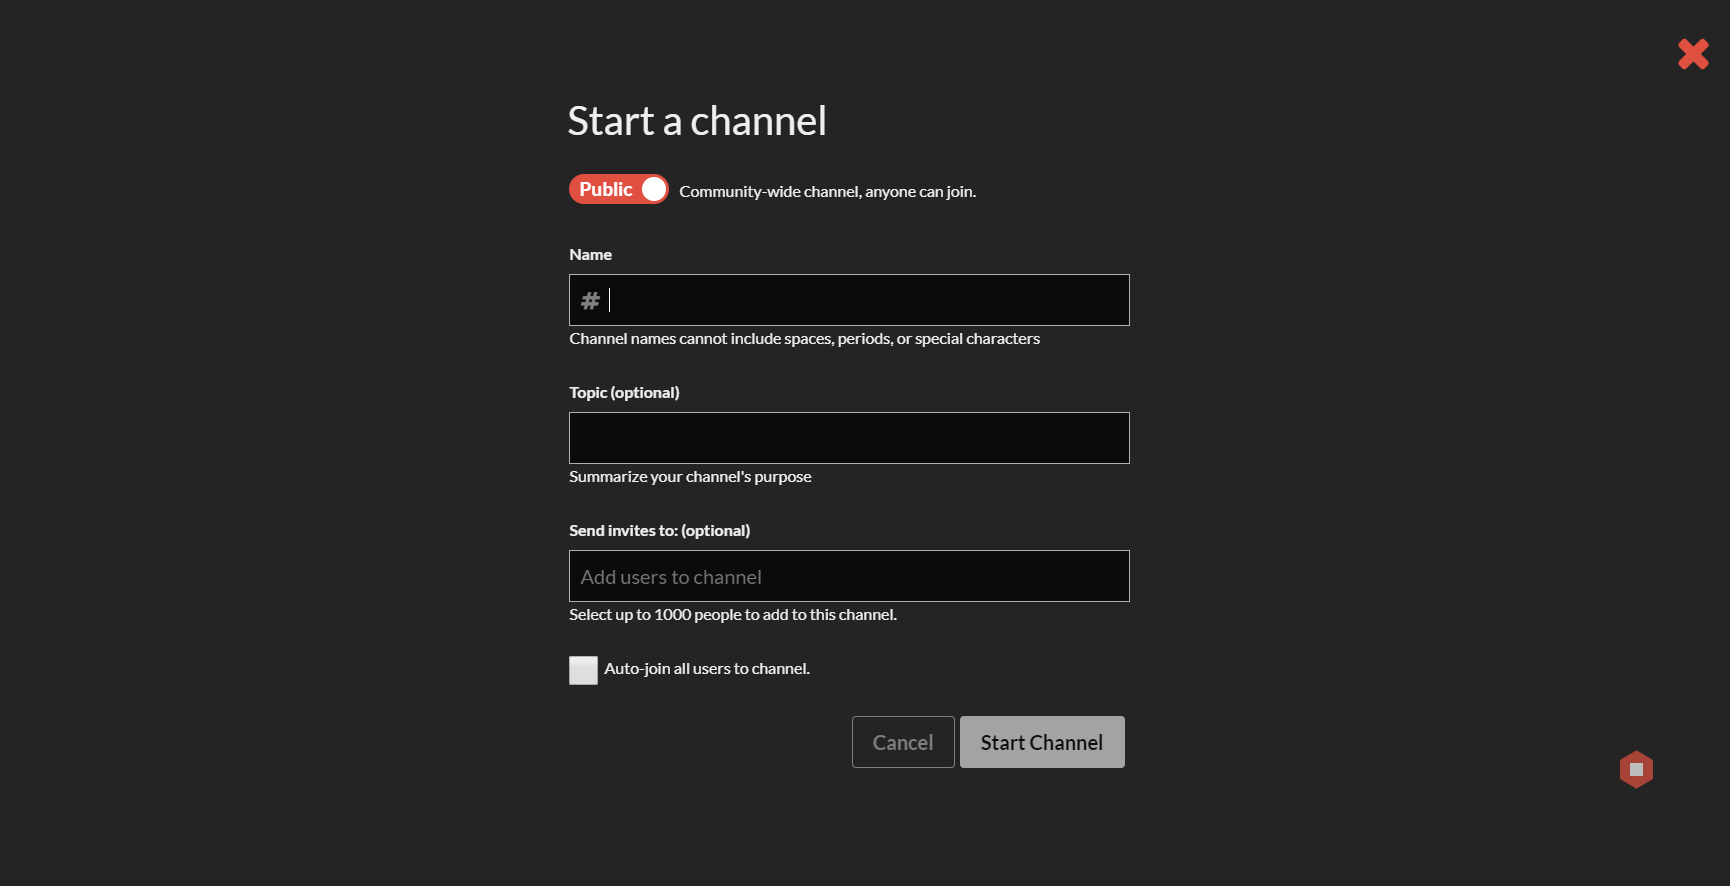
Public Channels
Anyone can create a new public channel in a community.
Clicking the plus sign [+] next to “Channels” in the left navigation area of SynQ UP will take you to the interface above. Simply provide a Name (only alphanumberic, hyphens, and underscores are permitted), set the topic, and select a few users to join you in your new channel to get started.
Admins, you’ll also be shown an additional option to “Auto-join all users to channel.” This will place all current and future members of your community into the channel, treating this as a new “hub” for users to see the next time they login to your community.
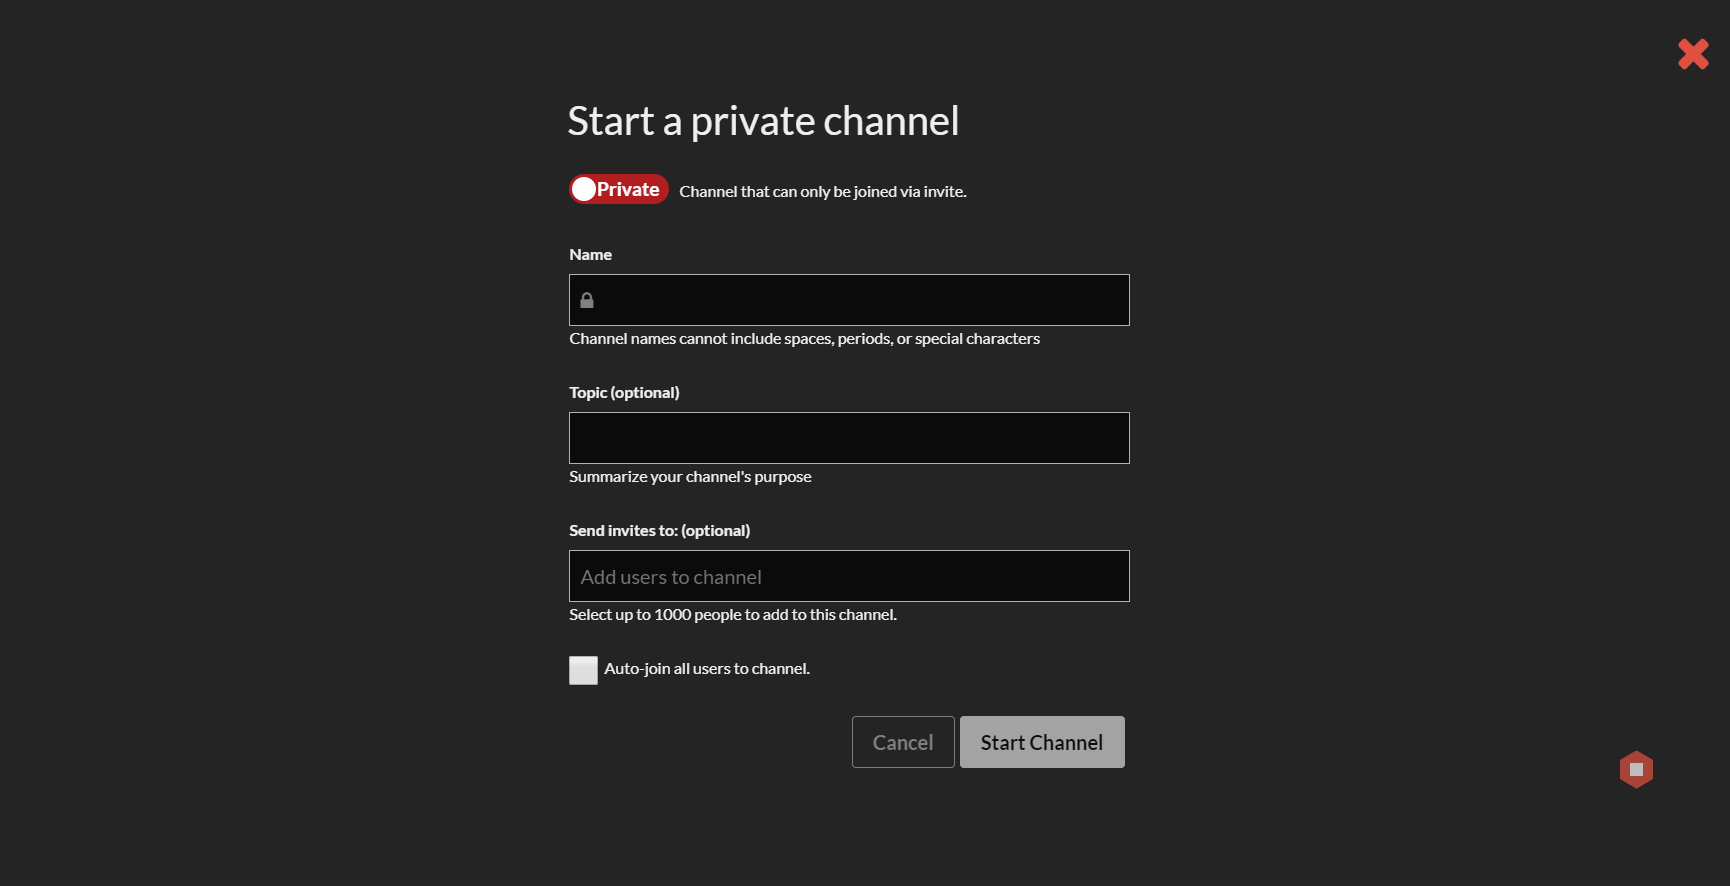
Private Channels
Think of private channels like a long-form group Direct Message, allowing you to invite a multitude of users to a back channel discussion that doesn’t clog up public-facing community conversations. Sidebar discussions like this can be created by any users.
Again, Admins are shown the option to “Auto-join all users to channel”, populating the entire community and future users into the private channel, if you’d like.
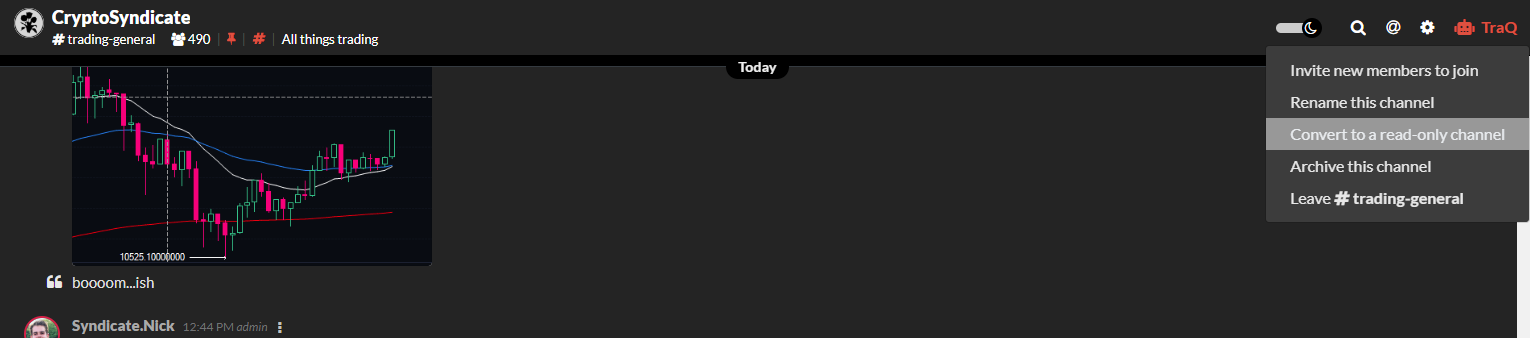
Read-only Channels
Admins and Moderators can convert any channel, public or private, into a read-only channel. A read-only channel allows community leaders to select authors from the community that can create “top level” or parent conversations in a specific channel.
To convert a channel into a read-only channel, simply click the “gear” icon next to TraQ, and select “Convert to read-only channel”. For security’s sake, community administrators are all automatically allowed to post to read-only channels.
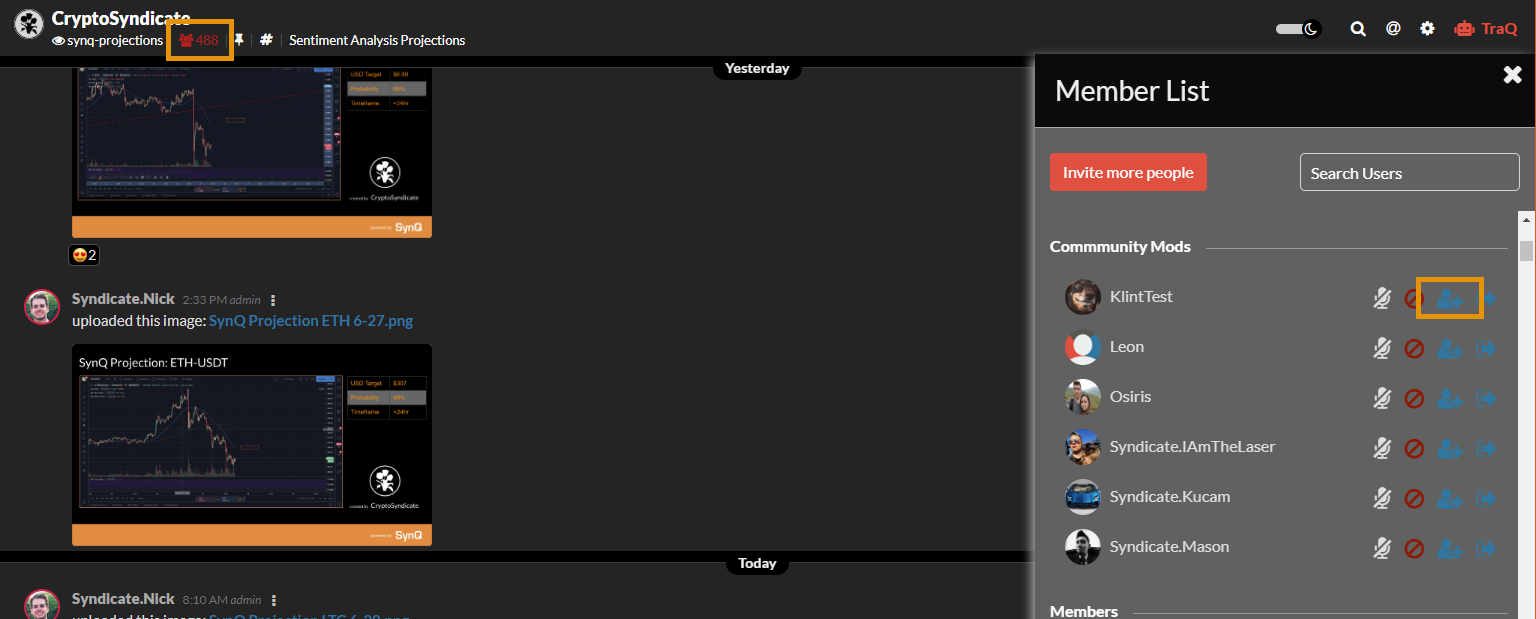
To assign “authorship” permissions to a user for a read-only channel, click the member count of the channel (top-left) and then search for, and click the user-plus icon next to the desired user.
This will grant access to the user, and they will then be allowed to create parent posts in the read-only channel.
Anyone in the community can reply to a parent post.
Premium Channels
If, as a community owner, you’ve opted to set up Premium Channels, simply click the diamond on the bottom left navigation, and click the [+] next to “Channels” in the Premium Channel pane. Creating a Premium Channel works exactly like a Public or Private channel, however, inviting users will require them to go through the payment process to unlock access to the Premium Channels. Anyone with a subscription to your Premium channel offering will have access to either the public or read-only Premium channels by default.